Thursday, March 31, 2011

Adjusting the line

So after riding on the line with the new engine I can spot a bunch of  mistakes, this turn in particular was too sharp and many of the gaps between the rails were too big.  This was causing frequent derailments.  I decided to desharpen the curve so moved over the brick edge (luckily I had just set them on the ground and they weren't cemented down.)  Then I disconnected one end of the rail, loosened up the ties and made the curve more gentle.  I had to cute off about 8 inches of rail on both sides and redrill holes for the rail joiners, the drilling jig from Real Trains made this very simple to do in the field.  At the same time I closed down the gaps in between the rails.

Here is the corrected and reballasted curve.  The train runs much better on it.  I've built up the ballast some but the gradient is still too much.  I'm going to raise the line at least another 6 inches with more ballast, just a few more dozen trips to the stone yard with the minivan.  When all is right I'll move the other brick line over to keep it even looking.  Proper planning would have avoided the need for this adjustment so learn from my mistakes.  Now I can ride the full 170 feet of track that is down.  So the next step is to finish the last 50 feet of line before I get to the last 30 feet the will require alot of fill and a larger bridge.

Thursday, March 24, 2011

First ride under motive power!

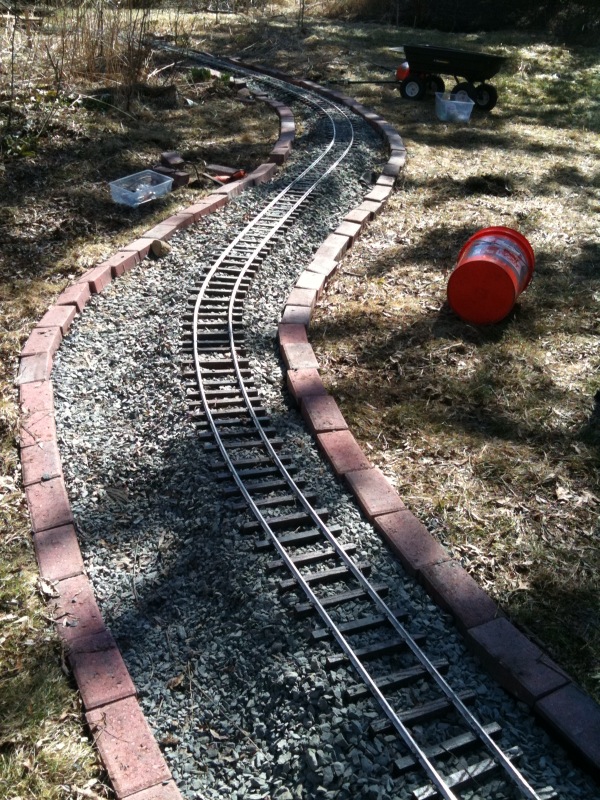
  So I've got 150' of rail down and a working engine and flat car.  Time to ride!  I've got the controller in my hand, the lights show battery status, the thumb lever controls your speed (if you let go it drops to zero,) the I/O switch changes forward and reverse and the switches on the bottom are for sound/horns/lights.  Once you have an engine going you can really tell everything you've done wrong.  I've got way too high grades (I have a digital grade level somewhere in the garage - must find), uneven side to side track, my gaps between the rails are too big and cause derailments (especially on curves), and my curves are too tight.  Otherwise all is well. 
  After getting the engine going there was essentially no further progress on extending the line, just fixing what I've got down so far.
  Here's a you tube link to the first drive:
http://www.youtube.com/watch?v=_EgwvLGIfoI

Spring returns and work resumes, now with an engine!

We have our first few days into the 50'sF, so back to work.  We're heading towards the first small bridge. 

Child labor laws are no obstacle on this railway as my railway gang removes ties from an old panel so they can be reused.  The rail needs to be bent for these curves so the ties must be removed first.

We make it to the first bridge going over a small stream.  About 150 ft of rail down now, 80 to go.

Motive Power!  I've got a Maxitrak chasis kit from the UK put together and upgraded the motor controller to the 4QD VTX with hand controller.

Attached it to my home made flat car.  Trucks (the wheels and axels) are from One Inch Scale Railroad Supply.

Coupler is a home made one with spare parts from the local big box store conecting to the Maxitrak chasis connector.